Installation
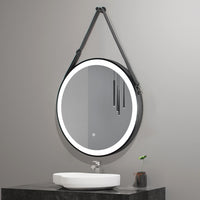
How to install your LED bathroom mirror
A clean, safe install in about 50 minutes with basic tools. Everything you need ships in the box.
Installation
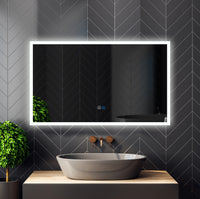
How to install your LED bathroom mirror
Most homeowners hang a TACOVICI mirror in about 50 minutes with basic tools. Everything you need ships in the box. Follow these steps for a clean, level, secure install.
In the box
-
2 x screws & white expansion plugs

-
4 x spacers

-
1 x positioning ruler (drill template)

What you'll need
- Drill
- Level
- Pencil
- Hammer
- Screwdriver
- Stud finder
- Voltage tester
Before you begin
Confirm your mirror model: hardwired mirrors need the bathroom circuit switched off at the breaker; plug-in mirrors only need a nearby GFCI outlet. Check that your wall can carry the mirror's weight — the included expansion plugs hold securely in drywall, but anchor into a stud wherever you can on larger mirrors. For mirrors over ~30 lb, have a second person help you lift and hang.
-
Turn off the power
At the breaker, switch off the circuit for your bathroom and confirm the existing light is dead with a voltage tester. Skip this step only if you're installing a plug-in model into a GFCI outlet.
⏱ 5 minWorking on a hardwired mirror? Photograph the existing wiring before you disconnect anything — it makes reconnection foolproof.
-
Stick on the spacers

Peel and press the four included spacers onto the back corners of the mirror. They keep the mirror sitting flat and square against the wall and leave a small air gap behind the glass.
⏱ 5 minThe air gap protects the mirror's backing from moisture and helps the anti-fog film heat evenly.
-
Mark the mounting points

Hold the positioning ruler against the wall, center it over the vanity, and use a level to keep it straight. Transfer the two hole positions with a pencil. Aim for the mirror's center at about 60–65" from the floor.
⏱ 10 minMeasure the gap between the two marks against the back of the mirror one more time before you drill — it's the one step you can't undo.
-
Drill and set the expansion plugs

Drill at each mark. Tap a white expansion plug into each hole with a hammer until it's flush, then drive a screw into the plug — but stop with about 20 mm of the screw still standing out from the wall. That exposed length is what the mirror hangs on.
⏱ 10 minOn tile, use a tile or masonry bit and go slow to avoid cracking the glaze. Where a mark lands on a stud, you can drive the screw straight in without a plug.
-
Connect the power
For hardwired mirrors, connect the matching wires (black-to-black, white-to-white, ground-to-ground) to the bathroom light circuit and cap them. For plug-in mirrors, simply route the cord to your GFCI outlet.
⏱ 15 minTuck the wire connectors neatly to the side so they don't get pinched between the mirror and the wall.
-
Hang and test

Lift the mirror so the keyholes on the back drop over the two standing screws, then slide it down to lock. Check it with the level and nudge until straight. Restore power, then touch the sensor to cycle 2700K–6500K, dim, and confirm the anti-fog activates. You're done.
⏱ 5 minIf the mirror sits slightly proud at one corner, back the matching screw in a turn or two until it sits flush.
Install questions
Common install questions
Plug-in models are fully DIY. Hardwired models connecting to an existing fixture are a common DIY job, but if you're adding a new circuit or unsure about your wiring, hire a licensed electrician.
The mirror hangs on the exposed length of the screws — the keyhole slots on the back of the mirror drop over them and slide down to lock. If you drive the screws all the way in, there's nothing for the mirror to catch on. Leave roughly 20 mm proud, hang the mirror, then fine-tune each screw a turn at a time until it sits flush and level.
The four adhesive spacers stick to the back corners of the mirror so it sits flat and square against the wall. They also leave a small air gap that keeps moisture off the mirror backing and helps the anti-fog film heat evenly.
Yes. Use a tile or masonry bit to drill, and tile-rated anchors. Go slow to avoid cracking the glaze, and set the expansion plugs the same way.
The included expansion plugs are rated to hold the mirror securely in drywall. Use them anywhere a mounting point doesn't land on a stud. On larger or heavier mirrors, try to land at least one screw in a stud.
The anti-fog pad warms the glass so it stays clear during a shower. On most models it switches on with the mirror or has its own touch control — give it a couple of minutes to warm up before you shower for a completely clear reflection.
Use a soft microfiber cloth with a little glass cleaner sprayed onto the cloth — not directly onto the mirror — and avoid abrasive pads or ammonia-heavy sprays near the edges. Keeping liquid off the edges protects the silvering and the anti-fog film.
Still have a question?
Our team usually replies within one business day.
Contact our teamRead the policies
A cleaner bathroom starts
with the right mirror.
Light, storage and style in one weekend upgrade — backed by a 1-year warranty and 30-day risk-free returns.
Shop LED Mirrors →